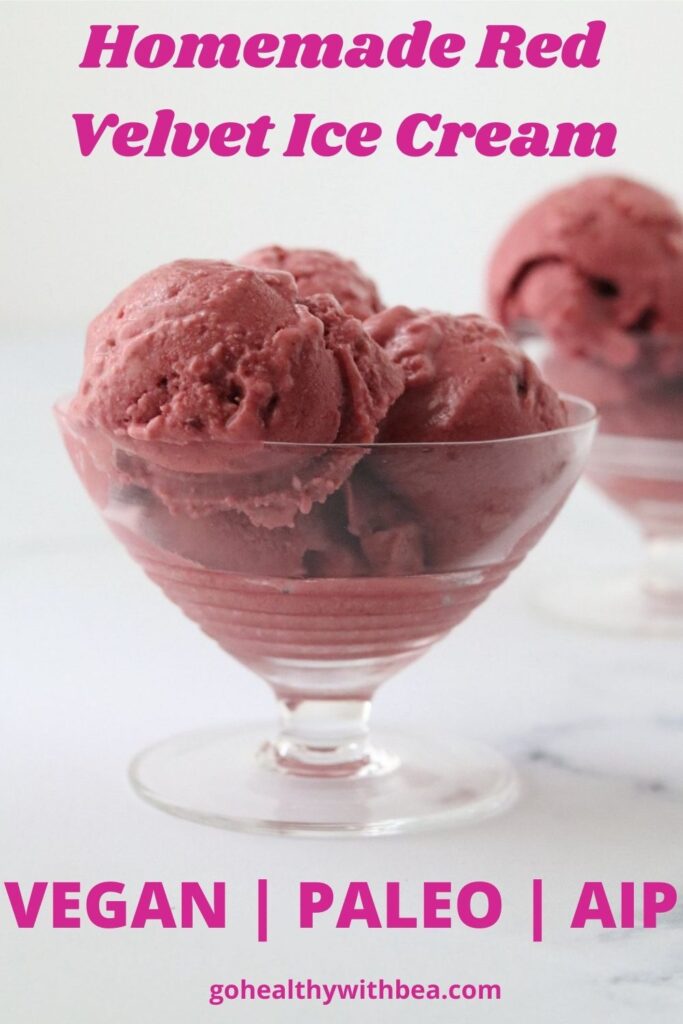
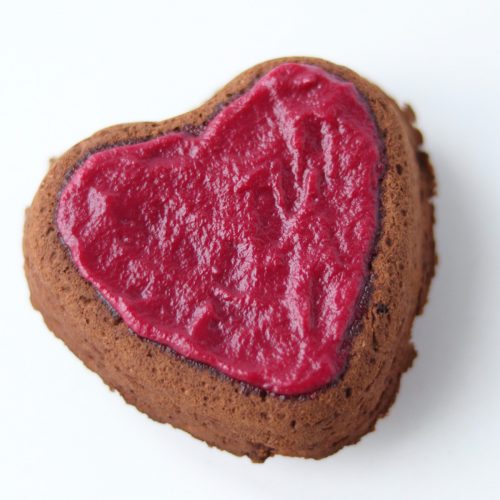
This super easy Homemade Red Velvet Beetroot Ice Cream is made in just a few minutes with a blender and 5 simple ingredients. This no churn and no dye ice cream is vegan, paleo and AIP compliant, but nobody will notice, not even the pickiest kid!
Jump To / Aller directement à
The idea for this recipe came to me while I was spending some time at my parents' home in the French countryside. They had quite a few red beets in their garden. My nephews were also there. And even though they are the cutest, they also are the pickiest 3 year old twin boys in the world. No way I would be able to make them eat red beet without hiding it somehow. But I'm always up for a challenge!
They already loved the homemade ice creams I made for them. That's how the idea struck me: I would add the beets to the ice cream! And guess what? They loved it!! They kept asking for more! lol
And there you go, I had created a new recipe while tricking my nephews into eating red beets: homemade red velvet ice cream!
If you want more gluten free desserts and snacks that use veggies, you can try my Banana carrot muffins or my Gluten free almond flour chocolate zucchini bread or my Gluten free pumpkin muffins (paleo, AIP, vegan).
⭐ Why you'll love this recipe
- This homemade red velvet beetroot ice cream is healthy.
- It's super easy to make.
- It's kid friendly (approved by my 3 year old twin nephews who are extremely picky).
- A creative way to eat vegetables.
- This recipe is vegan, paleo and AIP compliant but nobody will notice.
📖 Ingredient notes
Bananas. The ripper the bananas, the sweeter your blender ice cream will be and the stronger the banana taste will be.
That's why I prepare my homemade ice cream with yellow, almost green bananas, to avoid the strong banana taste. But that's my personal taste. Feel free to use ripper bananas.
👩🏻🍳Top tips
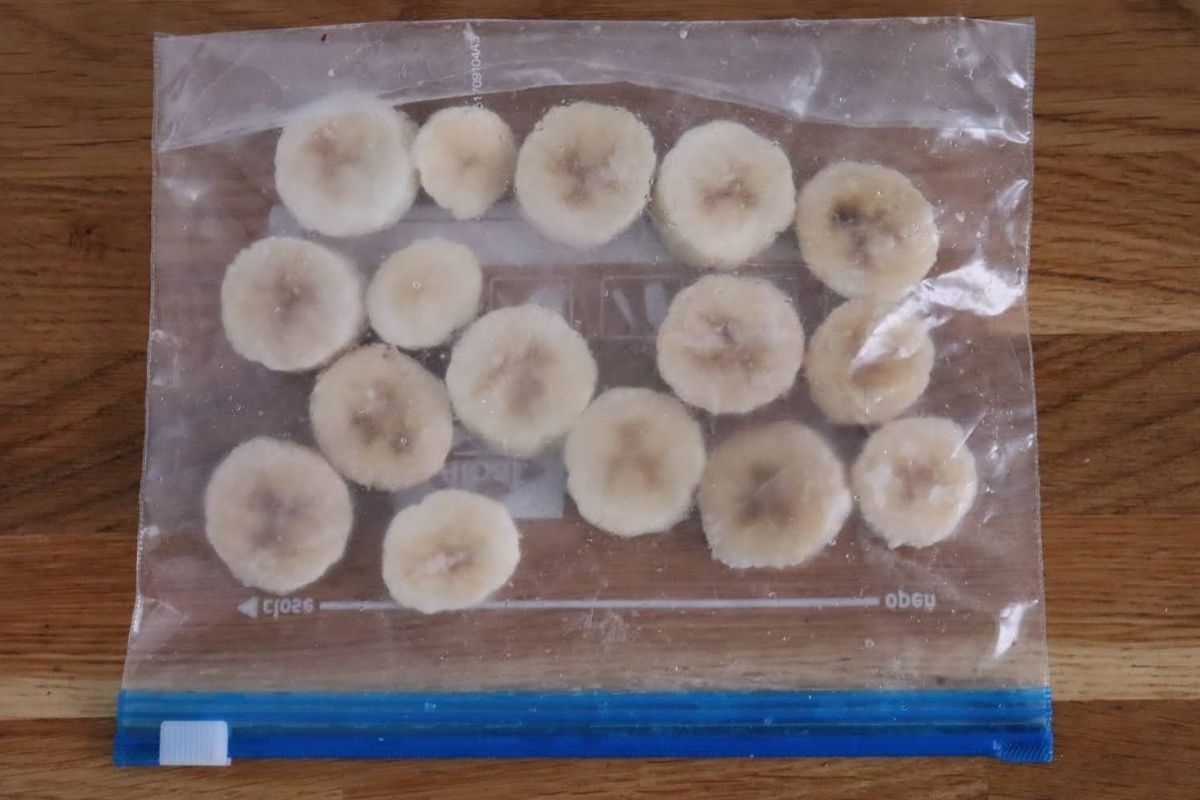
- Peel and slice the bananas into ½-inch slices. It will make the blending easier.
- Freeze the banana slices in a single layer. Otherwise they will stick together.
- Cut the red beets in small cubes and freeze them the same way.
- To make the blending easier, make sure to pour the coconut milk first in your Vitamix (or other high powered blender) before adding the other ingredients.
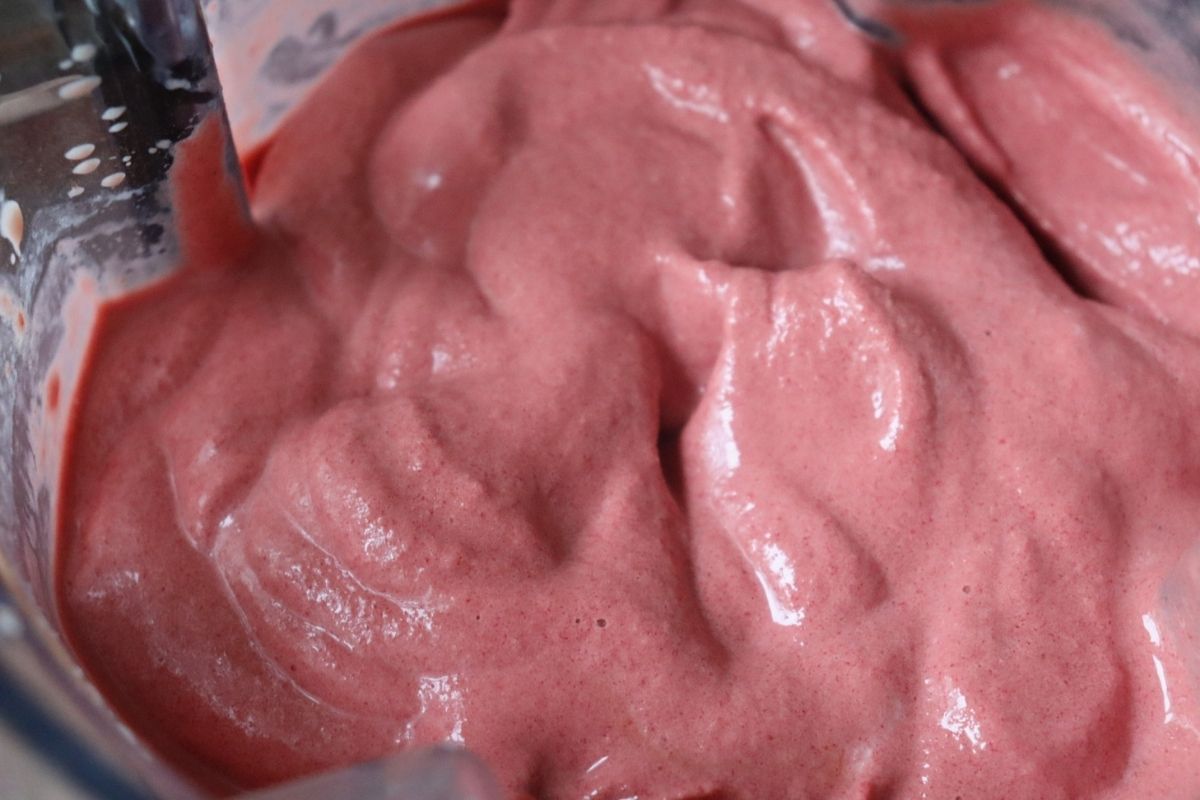
- Use the tamper to press down the ingredients. And blend until well combined.
🥣Step by step instructions
- Slice the bananas into coins. Cut the red beet into cubes. Transfer the banana coins and beet cubes to a freezer bag and put them in the freezer for at least 4 hours (or until they are frozen).
- Pour the coconut milk in your blender. Then add the frozen bananas and beets, carob (or cacao) powder and the optional maple syrup.
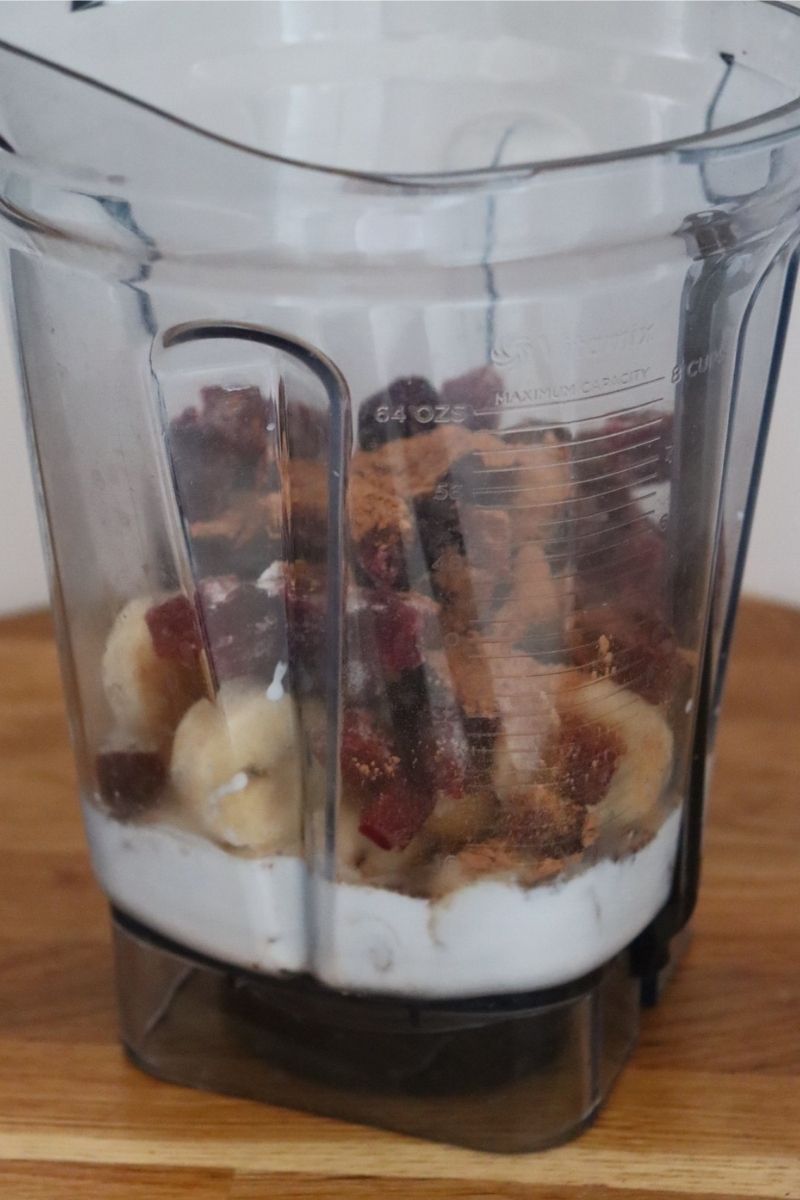
- And blend until you get a homogeneous mix while pressing down the ingredients with the tamper.
💭 Notes about your ice cream texture
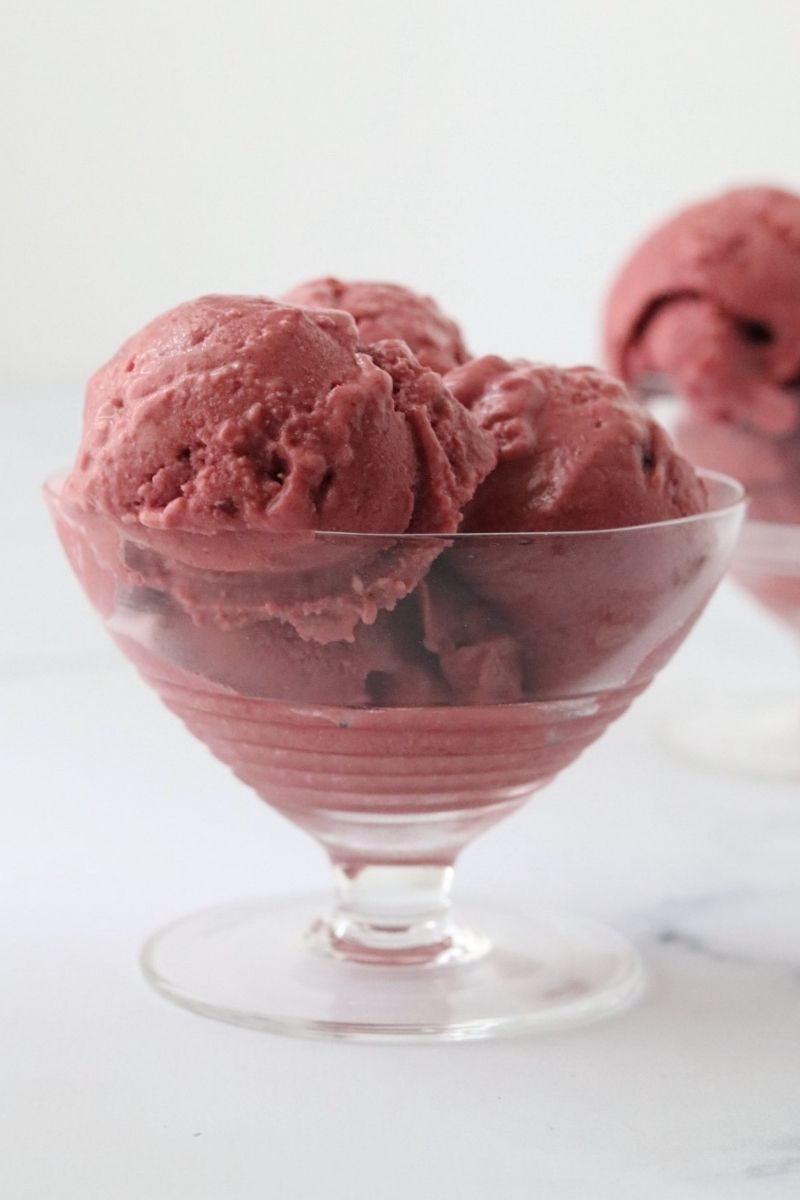
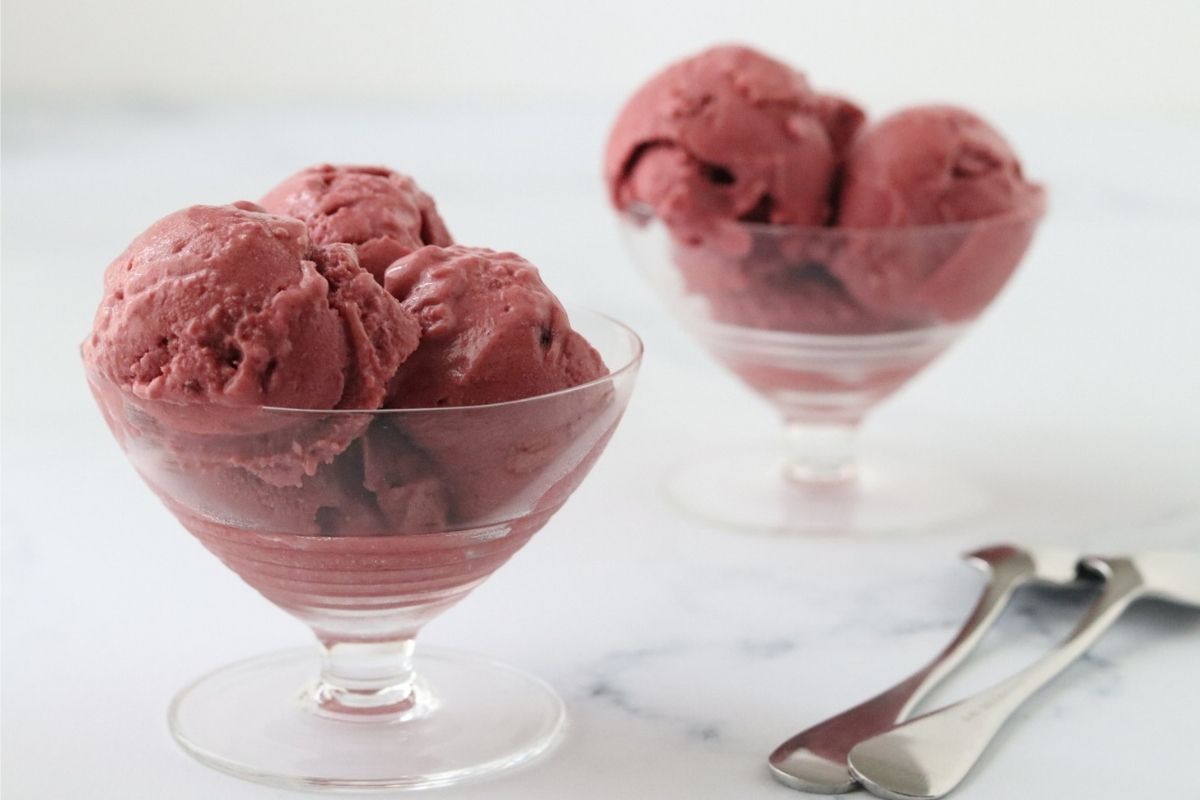
This banana based ice cream has a "soft serve" consistency immediately after you make it. You can serve your nice cream right away when it has a soft serve consistency.
Or if you want a scoop-able consistency, transfer your nice cream to a freezer safe dish and place in the freezer for about 2 hours. When I say about 2 hours, I really mean it. So set a timer if you don't want to forget about it. If you let it more than that, it will freeze solid as a brick so you will need to let it sit on your kitchen counter for a while before being able to scoop it.
🍪 Other dessert recipes you might like

Did you like this recipe? Please leave a 5-star rating 🌟🌟🌟🌟🌟 on the recipe card and leave a nice review below! Tag @gohealthywithbea on Instagram and hashtag #gohealthywithbea! Also, let's stay connected on social media and continue to cook together! You can find me on Instagram, Facebook and Pinterest.
📋 Recipe / Recette
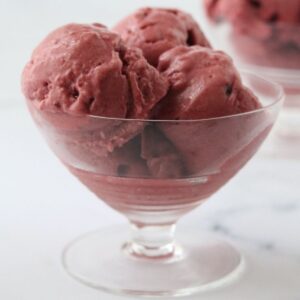
Homemade Red Velvet Beetroot Ice Cream (vegan, paleo, AIP)

Equipment

Ingredients
- 350 gram (2 cups + ¾ cup) peeled bananas (about 3 bananas)
- 250 gram (2 cups) cooked and peeled red beet (about 1 large red beet)
- 200 milliliter (¾ cup + 1 Tablespoon) coconut milk
- 1 Tablespoon carob powder (or cacao powder if you're not on AIP)
Optional
- 2 Tablespoon maple syrup
Instructions
- Slice the bananas into coins. Cut the red beet into cubes. Transfer the banana coins and beet cubes to a freezer bag and put them in the freezer for at least 4 hours (or until they are frozen).
- Pour the coconut milk in your blender. Then add the frozen bananas and beets, carob (or cacao) powder and the optional maple syrup. And blend until you get a homogeneous mix while pressing down the ingredients with the tamper.
- You can serve your red velvet ice cream right away when it has a soft serve consistency. Or if you want a scoopable consistency, transfer your ice cream to a freezer safe dish and place in the freezer for about 2 hours. And voilà!Bon appétit!
Cameo Cobery says
Here’s a pro tip I came up with today. If you like to keep your nice cream in the freezer, you can scoop it out after you make it into a balls, freeze them individually and have you nice cream pre-scooped ready to eat.
Can’t wait to try this recipe, looks delicious!
Bea C. says
Hi. Thanks for the tip! I hope you will enjoy this nice cream recipe.
Tina says
Hi Bea! Thank you so much for all these yummy recipes. I'm new to AIP, so am having fun exploring 😉 I wanna make your recipes but can't get the button to click to the 'cups' measurement instead of 'weight'...any advice on how to get that to work?! Thanks!
Bea C. says
Bonjour Tina. Thank you for reporting this problem. Currently working to fix it. Will let you know when it's fixed!
Bea C. says
The problem is now fixed. Sorry it took a while, it was not easy to find the reason for this problem. Let me know if you try some of my recipes!